How to Launch High-Converting RCS Campaigns with Celitix
RCS messaging allows businesses to send interactive, media-rich messages that drive higher engagement and conversions. With Celitix, launching an effective RCS campaign is simple when you follow the right steps.
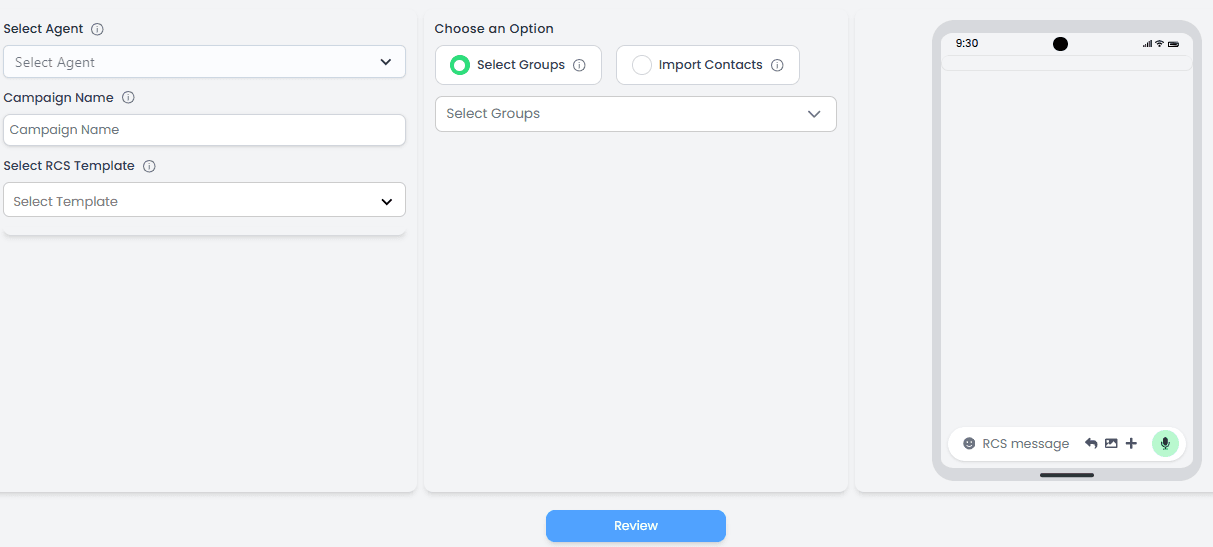
Step 1: Select Your Agent
Log in to your Celitix dashboard and choose the assigned agent for the campaign. This ensures proper tracking and management of outgoing messages.
Step 2: Create a Campaign Name
Enter a clear and organized campaign name. Use names that help you easily identify the purpose, audience, or date of the campaign for future reporting.
Step 3: Choose an Approved RCS Template
Select a pre-approved RCS template from the dropdown. Make sure your template includes: • Engaging images or rich media • Clear and concise messaging • Strong CTA buttons (Buy Now, Learn More, Book Today) • Well-designed templates directly impact click-through rates (CTR).
Step 4: Select Your Audience
Choose how you want to target users: • Select existing contact groups • Import contacts directly • Segment your audience based on behavior, location, or interests to increase relevance and improve conversions.
Step 5: Review the Message Preview
Before sending, use the live preview feature to check: • Formatting and layout • Media quality • Button placement • Personalization fields • This ensures your campaign looks professional and error-free.
Step 6: Launch the Campaign
Once everything is reviewed, click send and launch your RCS campaign.
Step 7: Monitor Performance
Track delivery reports and engagement metrics such as delivered, read, and button clicks. Use this data to optimize future campaigns. By following these steps in Celitix, you can create engaging RCS campaigns that drive higher engagement, stronger customer interaction, and measurable ROI.

Elevate Your Customer Experience
Go beyond the ordinary and connect with your target groups to grow your business.